“Turning on your signal is a sign of civilized driving,” a humorous yet meaningful saying for any driver. But do you truly understand your car’s turn signal system and how it works? Today, let’s delve into the details of wiring car turn signals with XE TẢI HÀ NỘI, equipping you with the knowledge to confidently handle unexpected situations on the road.
Understanding Car Turn Signals
What are Turn Signals? Their Crucial Role
Turn signals, also known as blinkers or indicators, are an essential component of every car. They emit flashing amber light, signaling your intended direction of travel to other vehicles.
Mr. Nguyen Van A, an automotive expert at An Phat Auto Repair Shop in Hanoi, states: “Using turn signals correctly plays a vital role in ensuring road safety, enabling drivers to communicate effectively and prevent potential accidents.”
Structure and Working Principle of Turn Signals
A car’s turn signal system consists of the following main components: the turn signal switch, control module, front/rear turn signal lights, and turn signal lights on the side mirrors.
When you activate the turn signal lever, the switch closes a circuit, sending a signal to the control module. The module receives the signal and controls the flashing of the turn signal lights at a specific frequency.
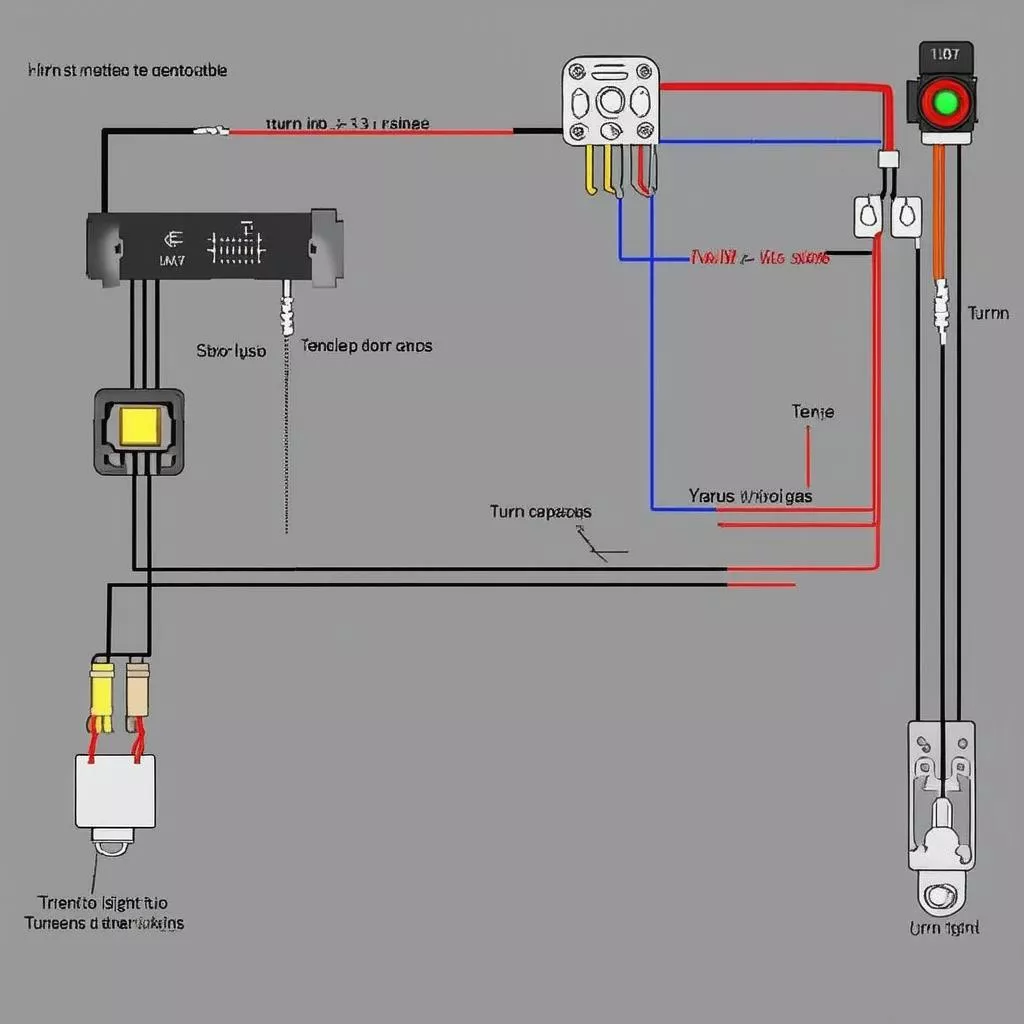
Car turn signal wiring diagram
Step-by-Step Guide to Wiring Car Turn Signals
Tools Required
To wire car turn signals, you’ll need the following basic tools:
- Circuit tester
- Wire stripper
- Electrical tape
- Wires (if replacement is needed)
- New turn signal lights (if replacement is needed)
Steps
Step 1: Disconnect the Battery
Before performing any electrical work on your car, disconnect the battery to ensure safety.
Step 2: Identify the Connection Point
Depending on whether you’re installing new turn signals or repairing the existing system, locate the connection point on your car. This is usually behind the headlight/taillight assembly or on the side mirrors.
Step 3: Connect the Wires
Use a wire stripper to remove a small section of insulation from the ends of the wires to be connected. Only remove enough insulation to expose the wire core, avoiding damage to the wire itself.
Then, connect the wires according to the manufacturer’s wiring diagram. Typically, the positive (+) wire of the turn signal is red or yellow, while the negative (-) wire is black or brown.
Step 4: Insulate the Connections
After connecting the wires, use electrical tape to securely wrap the connections, ensuring no exposed wires.
Step 5: Recheck and Reconnect the Battery
Thoroughly inspect all connections for any loose or exposed wires after completing the wiring. Finally, reconnect the battery and test the turn signals.
 Testing car turn signals
Important Considerations When Wiring Car Turn Signals
- Consult the manufacturer’s instructions before proceeding.
- Use high-quality wires and turn signal lights suitable for your car.
- Connect the positive and negative terminals of the turn signal lights correctly.
- Insulate all connections carefully.
- If you’re unsure about your skills, seek professional assistance from a reputable auto repair shop.
Frequently Asked Questions
Q: Is it a problem if my turn signals are flashing faster than usual?
A: This could indicate a burnt-out or failing turn signal bulb. Check and replace the bulb if necessary.
Q: Why aren’t my turn signals working?
A: Possible causes include a blown turn signal fuse, a faulty bulb, or a broken wire. Thoroughly inspect the system to identify and fix the problem.
Q: Can I adjust the flashing frequency of my turn signals?
A: Altering the flashing frequency may affect the signal’s effectiveness. It’s best to leave the frequency as set by the manufacturer.
XE TẢI HÀ NỘI – Your Trusted Auto Repair and Maintenance Provider in Hanoi
If you’re experiencing issues with your car’s turn signal system, visit XE TẢI HÀ NỘI. Our team of experienced and dedicated technicians is committed to providing high-quality auto repair and maintenance services at reasonable prices.
XE TẢI HÀ NỘI has locations in various districts of Hanoi, including Cau Giay, Thanh Xuan, Ha Dong, and Hoan Kiem, to serve you quickly and conveniently.
We also offer a wide range of other services, such as:
- Engine, transmission, chassis, and electrical system repair and maintenance.
- Installation of genuine car accessories.
- 24/7 roadside assistance.
Conclusion
We hope this article has provided valuable information on how to wire car turn signals. Remember, using your turn signals correctly contributes to a safer road environment for everyone.
If you have any questions, leave a comment below or visit our website at xetaihanoi.edu.vn for detailed advice. Don’t forget to share this article with your friends and family to promote safe driving practices.