The saying “well maintained is well kept” holds true, especially for your beloved vehicle. Equipping your car with supportive accessories and devices not only protects it but also provides peace of mind on every journey. A dash cam is one such ideal “companion.” But how do you install a dash cam correctly? Let XE TẢI HÀ NỘI guide you through the process with this detailed article!
Why Should You Install a Dash Cam in Your Car?
In today’s chaotic traffic, having a dash cam in your car is like having a “protective talisman,” offering numerous benefits:
- Evidence Verification: Records your entire journey, providing irrefutable evidence in case of collisions or traffic disputes.
- Security Protection: Enables remote vehicle monitoring, deterring theft and property damage.
- Memory Preservation: Captures memorable moments on every road trip.
- Improved Driving Awareness: Helps you adjust driving habits and adhere to traffic regulations.
Guide to Installing a Dash Cam in Your Car
Installing a dash cam yourself is not too complicated. You can easily do it at home with these simple steps:
Step 1: Choose the Installation Location
The dash cam’s location directly impacts the recording angle and effectiveness. The ideal position is behind the rearview mirror, ensuring it doesn’t obstruct the driver’s view.
Step 2: Install the Camera
- Attach the Camera to the Windshield: Use 3M adhesive tape or a specialized mount to secure the camera.
- Connect the Power Cord: Connect the camera’s power cord to the vehicle’s power source, either the cigarette lighter port or directly to the car battery.
- Route the Signal Wire: For rear cameras, you need to run the wire along the car’s ceiling or floor to the front camera.
Step 3: Set Up and Test
- Format the Memory Card: Use a high-quality memory card and format it before use.
- Configure Settings: Adjust recording parameters, audio, date, and time according to your needs.
- Check Functionality: Start the car and check if the camera is operating correctly and the recording angle is suitable.
Step 4: Verify Camera Operation
After completing the installation, ensure the camera is functioning properly and the recording angle is appropriate.
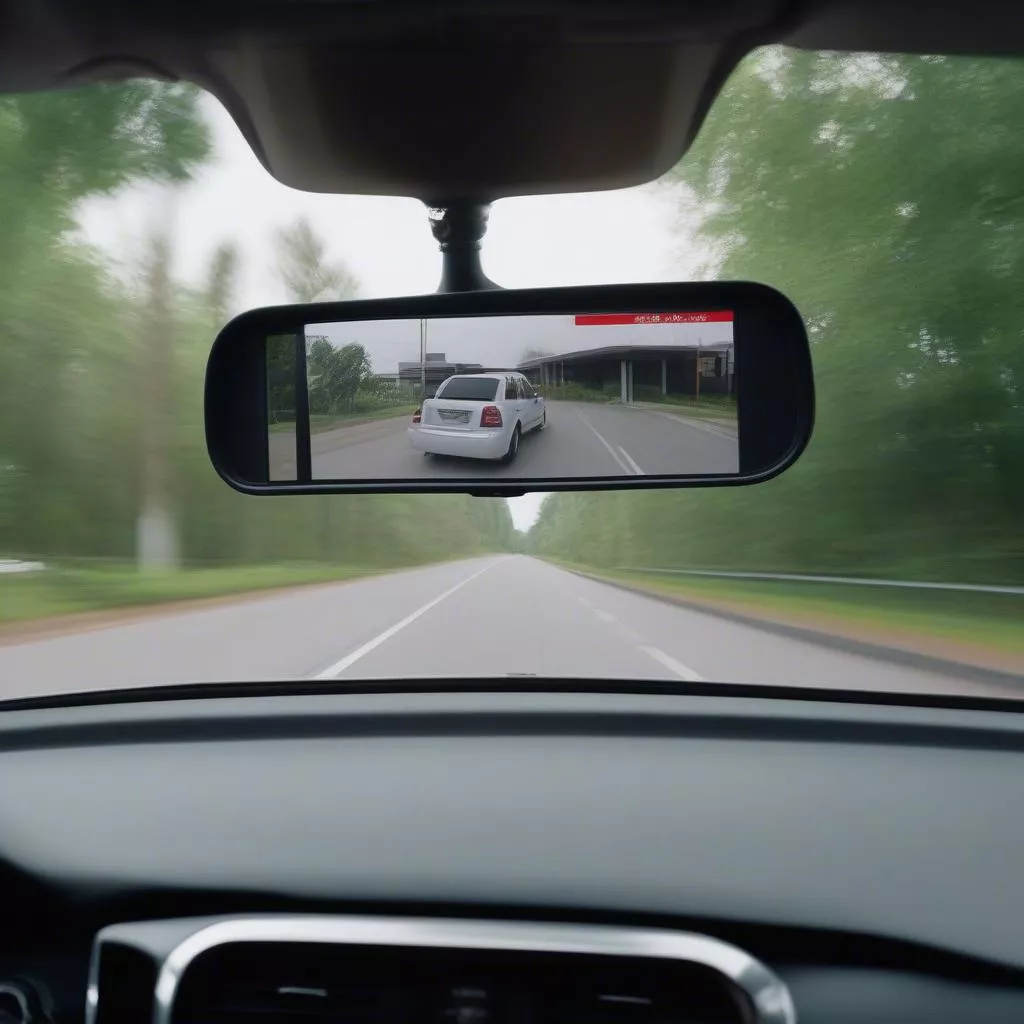
Step 5: Choosing the Dash Cam Installation Location
The dash cam’s placement directly affects the recording angle and video quality. The ideal spot is behind the rearview mirror, ensuring an unobstructed driver’s view.
Dash cam installed behind the rearview mirror
Important Considerations for Dash Cam Installation
- Choose a genuine, high-quality camera with high resolution for clear images.
- Install the camera correctly, avoiding obstruction of vision or interference with airbags.
- Use a high-capacity, high-speed memory card for longer video storage.
- Regularly check and back up data from the memory card.
Frequently Asked Questions about Dash Cam Installation
Q: Where can I get a dash cam installed reliably in Hanoi?
A: XE TẢI HÀ NỘI, located at [XE TẢI HÀ NỘI address], is a trusted provider of genuine dash cam installation services at competitive prices.
Q: Does a dash cam consume a lot of power?
A: Dash cams are designed for low power consumption and will not significantly affect your car’s battery.
Q: Which type of dash cam should I choose?
A: Depending on your needs and budget, you can choose a single-channel, dual-channel, or a dash cam with integrated GPS and Wi-Fi.
Conclusion
Installing a dash cam in your car is essential for safety and provides numerous practical benefits. We hope this article has provided you with valuable information on how to install a dash cam in your car. If you have any further questions, please contact XE TẢI HÀ NỘI for detailed advice.